Online centre meetings
Options for running Online Meetings
There may be times that you need to catch up with your centre members and this can be achieved through an online meeting or using other online tools.
Some options are listed below, with guidance on how to use – these are not an endorsement or recommendation but just for information sharing.
When running an online meeting some things to consider are:
- Make sure to have emailed out any important documents or items to consider in advance.
- Allow some time at the beginning for everyone to get in – especially the first time using a new tool.
- Using the “Chat” feature in most of the online meeting tools to record key points, agreements, or allow people to share additional thoughts.
- Having people be muted when they are not talking to reduce background noise.
- Make sure the ‘Chair’ of the meeting, does go around and check that each person can hear, and that you are able to hear them.
- Make sure to check in with people as you go through the meeting to make sure they have been able to contribute.
- Use the Share Screen function when there are documents to be looked at (Agenda, accounts, a policy)
- Whilst some people may not be able to use video, do use it when possible as it allows you to get a sense of how people are feeling, and sometimes people forget they are muted so if there is no video you may miss that they are trying to talk.
Teams
Microsoft Teams is part of Office 365, so every Playcentre has access to a Microsoft Teams account, through your @playcentre.org.nz email address. You will not need to pay to use this service.
If you haven’t accessed this yet –
One person would use a browser (Chrome/Safari/etc) to go to portal.office365.com, and login using your @playcentre.org.nz email address. It should take you to a screen that looks a bit like this:

Click on the Teams icon, and it will take you to a site to download Teams to your computer, or you can click on “Use Web app instead”.
Once on the Team app – whether the downloaded version, or the online version – go to Calendar on the left hand side.
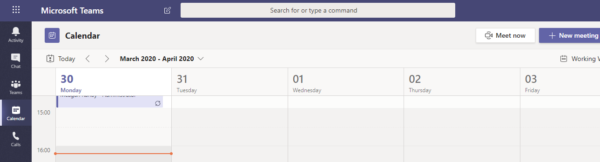
In Calendar – there is a “Meet Now” button at the top right hand side.
Click on that and it will open a meeting, that only you are in. The first time you will need to allow it to use your microphone and video.
A screen will come up showing you in the middle (if you have a camera active) and it will have a “Join Now” button. Click that to go into the meeting.
Once in the meeting, you need to have the “people” tab open on the right hand side – if it is not, click the purple people icon, in the row of buttons near the bottom:

Once the people tab is open, there is a place to invite people to the meeting and next to it is a “Copy Link” icon:
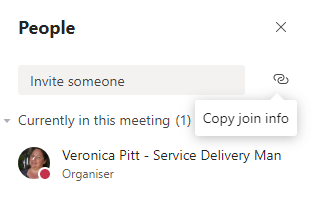
If you click on the interlinked chain symbol, then go to your email, you can paste the link into an email and send it to your centre members for them to join the meeting.
Once the link has been created and sent, you can use it at any time to start another meeting.
Each person receiving the email, will click on the “Join Microsoft Teams Meeting” link and will be prompted to download Teams as well (on computer or phone), and can either sign up, or “Join as Guest”. Either will work to bring them into the meeting. They also will need to click on the “Join Now” button once it opens.
Within the meeting controls you can also chat, share your screen, and see each other while you are talking.
There are some videos on using Teams meetings, here: https://support.office.com/en-us/article/join-a-teams-meeting-078e9868-f1aa-4414-8bb9-ee88e9236ee4
Zoom
This is an online video meeting tool. https://zoom.us/
Sign up is simple – just go to the website, click Sign Up, and use your email address to create an account. Once you have an account you can invite other people to the meeting.
The free version allows you to have up to 100 people in a meeting, but each meeting is limited to 40 minutes. You can set up two meetings, one after the other if you need to, but it is also a good incentive to keep the meeting short! If there are only 2 people in the meeting it can go for as long as needed.
The lowest paid plan is US$14.99 per month, and that will allow you to host meetings up to 24 hours long with up to 100 participants. Assuming that your centre does not have a credit card – you would need a member to have this charged to their card and claim reimbursement. This can be charged monthly and you can cancel at any time.
If you decide you want/need a paid account for the centre, you only need one as that account is the ‘host’ and can then invite in people who do not have an account or have free accounts.
Zoom has some training resources here:
https://zoom.us/docs/en-us/covid19.html
Key ones are:
How to Join a Meeting:
https://support.zoom.us/hc/en-us/articles/201362193-How-Do-I-Join-A-Meeting-
Scheduling a Meeting:
https://support.zoom.us/hc/en-us/articles/201362413-How-Do-I-Schedule-Meetings-
and Meeting Controls:
https://support.zoom.us/hc/en-us/articles/201362603-What-Are-the-Host-Controls-
To host a meeting: once you are signed in, at the top right of screen are three options – Schedule a Meeting, Join a Meeting and Host a Meeting
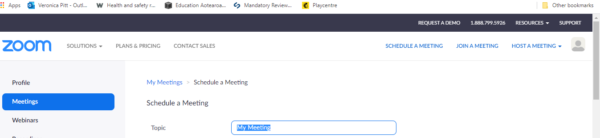
Schedule a Meeting: Allows you to set up a time for a meeting and send out the link to participants.
Join a Meeting: allows you to join a meeting you have the link or code for
Host a Meeting: Allows you to start a meeting immediately, and invite people from within the meeting screen.
On the Schedule a Meeting page, you will enter in a name/topic for the meeting, time and date.
Suggestions:
- It is a good idea to tick the “Enable Join Before Host” option, as that allows people to go into the meeting without the host being there. If it is not ticked no-one else can join the meeting until the host (the person/email address that set up the meeting) is there.
- Untick “Require Meeting password.”
Once you click save, it will take you to a page that has the details of the meeting, including the “Join URL” which is the link people need to be able to access the meeting. Out to the right hand side of that will be a “Copy Invitation” link.

If you click on the “Copy Invitation” it will give you an invite that you can copy and then send in an email to your centre members.
In the invite there are also the phone numbers that people can call to join the meeting via telephone, if they do not have access to the internet.
Once in a Zoom meeting you can see video boxes of all the people in the meeting, there is a chat box for notes or asking side questions. You can also use the “Share screen” button for one person to share a document from their computer screen – this is helpful for agendas, words to karakia or waiata, or looking at the accounts, etc.
It is helpful if everyone mutes when they are not talking.
When it is time to talk you can unmute, or you can hold down the space bar whilst talking and that will temporarily unmute you.
Skype
Online video calls tool. https://www.skype.com/en/free-conference-call/
As per the information on the link above, you can quickly set up a Skype call link (but clicking the button on that link) and invite members to it. You do not need to sign up or download anything. Once you have the link you can email it out to centre members and anyone with the link can join the meeting.
You can also share your screen in Skype if you need to all look at one document.